Excellent quality for Blackcurrant Extract in Estonia
Excellent quality for Blackcurrant Extract in Estonia Detail:
[Latin Name] Ribes nigrum
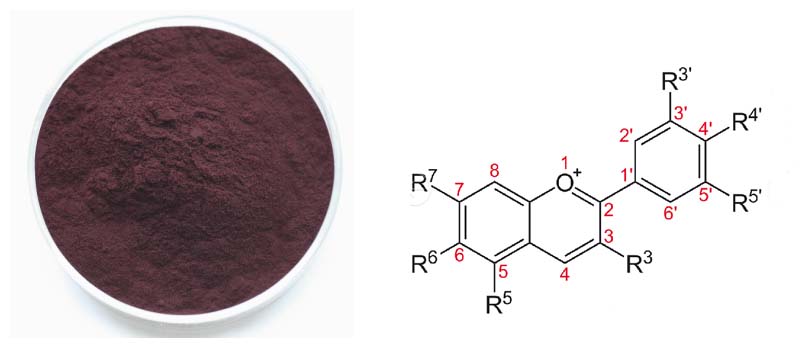
[Specification] Anthocyanosides≥25.0%
[Appearance] Purple black fine powder
Plant Part Used: Fruit
[Particle size] 80Mesh
[Loss on drying] ≤5.0%
[Heavy Metal] ≤10PPM
[Storage] Store in cool & dry area, keep away from the direct light and heat.
[Shelf life] 24 Months
[Package] Packed in paper-drums and two plastic-bags inside.
[Net weight] 25kgs/drum
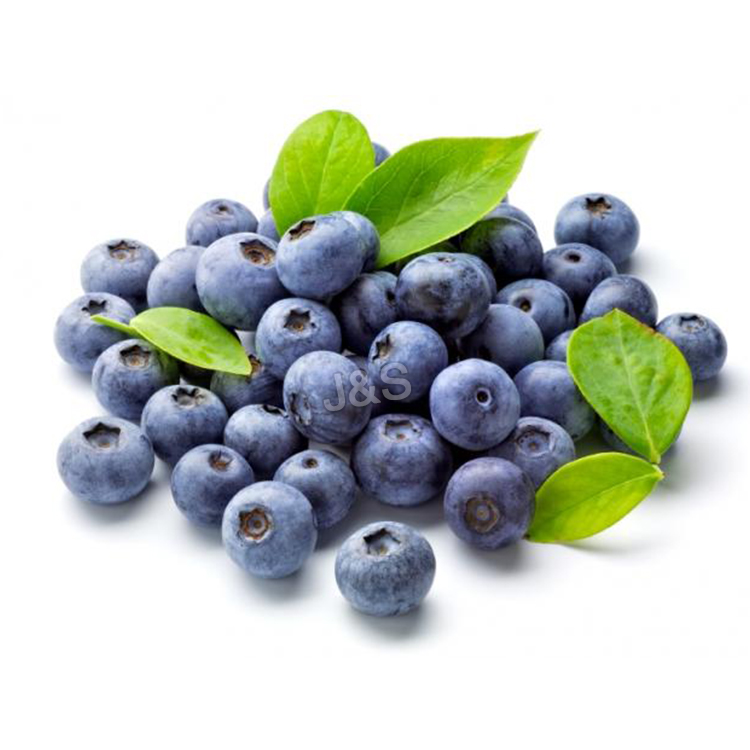
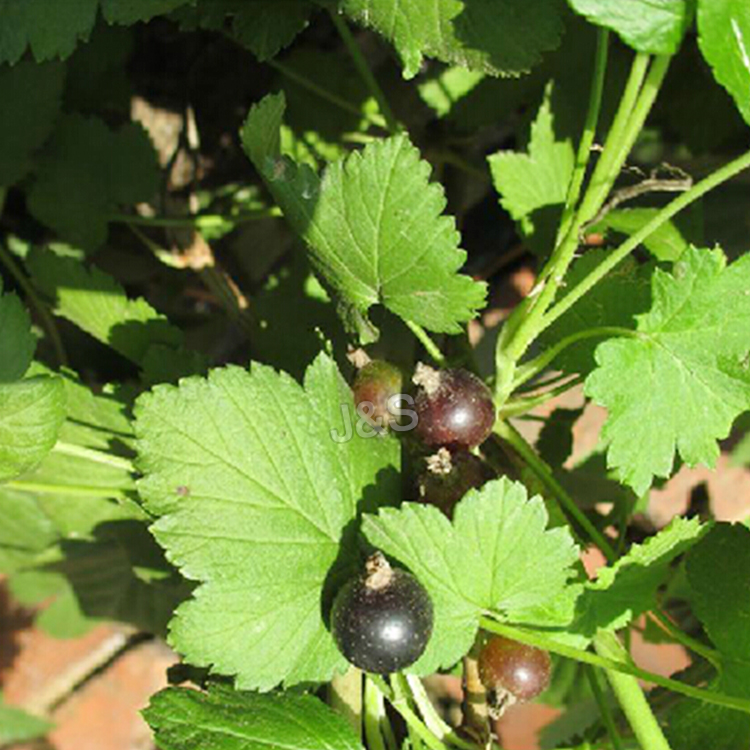
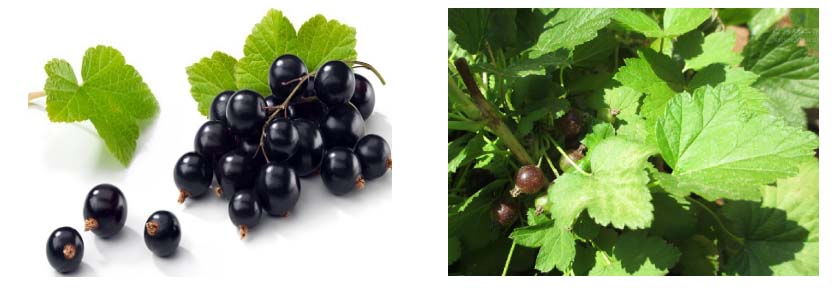
[What is Black currant?]
The black currant bush is a 6-foot tall perennial that entered the world somewhere in the regions that include northern Asia and central and northern Europe. Its flowers display five reddish-green to brownish petals. The celebrated black currant fruit is a glossy-skinned berry that carries several seeds laden with marvelous nutritional and curative treasures. An established bush can produce ten pounds of fruit per season
[Benefits]
1. Vision help my eyesight
2. Urinary Tract Health
3. Ageing & Brain Function.
4. Natural Brain Boost
5. Digestion & Fighting Cancer
6. Reducing Erectile Dysfunction
Product detail pictures:
Related Product Guide:
To become the stage of realizing dreams of our employees! To build a happier, much more united and far more professional team! To reach a mutual profit of our clients, suppliers, the society and ourselves for Excellent quality for Blackcurrant Extract in Estonia , The product will supply to all over the world, such as: UAE, Ukraine, Islamabad, We taking advantage of experience workmanship, scientific administration and advanced equipment, ensure the product quality of production, we not only win the customers' faith, but also build up our brand. Today, our team is committed to innovation, and enlightenment and fusion with constant practice and outstanding wisdom and philosophy, we cater to the market demand for high-end goods, to do experienced products and solutions.
SUBSCRIBE FOR MORE RECIPES https://bit.ly/BethsEntertaining
Learn the tips and tricks associated with perfecting the French Macaron cookie, one of the hardest cookies to master.
MY FAVORITE PRODUCTS TO HELP ACHIEVE MACARON SUCCESS! https://bit.ly/2oPquWw (These link goes to Amazon, via Kit.com where I am an affiliate partner)
MORE FOOLPROOF RECIPES
Foolproof Brownies https://bit.ly/1wu0bCq
Foolproof Crepes https://bit.ly/1sXywZS
Foolproof Tiramisu https://bit.ly/1ytO2hW
Foolproof Snickerdoodles https://bit.ly/1ww1gLR
RECIPE FOR BETH’S FOOLPROOF FRENCH MACARONS
Makes 24 completed sandwich cookies
INGREDIENTS
3 Egg Whites
¼ cup white sugar (50 g)
2 cups confectioners sugar (200 g)
1 cup almond flour (120 g) (SEE NOTE BELOW)
pinch of salt
¼ tsp cream of tartar (2 ml) * You can omit if needed, just may take a bit longer to reach stiff peaks but the recipe will still work)
NOTE: If you cannot find almond flour where you live, check out this great video from my new friend Dzung at Honeysuckle Catering and she’ll show you a great easy way to make it yourself! https://bit.ly/WZQ1fZ
RASPBERRY BUTTER CREAM
1/4 cup salted butter (60g)
3/4 cup powdered sugar (75 g)
1 cup (150 g) fresh raspberries, worked through a sieve to extract 3 tbsp of juice
METHOD:
Preheat oven to 300F degrees
Beat egg whites until foamy, then add salt, cream of tartar and white sugar for 8-10 mins. TIP: #1 eggwhites should be room temp. To create room temp eggs, submerge in warm water for 5 mins.
Whip until they form a peak that stands upright. Think Seattle Space needle.
Then add the food coloring. TIP#2 Color does fade as it cooks, so do a shade or two darker than you want them to be.
TIP#3 Sift almond flour, and powdered sugar. What remains will be the larger lumps of almond pieces. Just discard those, or use them to snack on ![]() You want a really fine powder mixture to create a smooth and pretty on top to your cookie.
You want a really fine powder mixture to create a smooth and pretty on top to your cookie.
Fold flour/sugar mixture into the egg white mixture. TIP#4 This is where all your hard work can really go wrong. Under mix and your macaroons will be lumpy and cracked when the bake with no feet, over mix and your macaroons will be flat and won’t have feet, the mark of a well-made macaron. In my experience 65-75 turns of your spatula when folding is about the right amount of time. But again, it can be tricky, depends on how strong you are, Ha! So it can take a few tries to get it right. But when you do, the trumpets will blare and you will feel SO accomplished!
Transfer batter to a pastry bag.
Pipe out 1 inch rounds on a baking sheet lined with parchment paper.
TIP#5: tap the pan hard at least 2-3 times to release the air bubbles. This will prevent the tops of your macaroons from cracking.
TIP#6 Let them sit out for 20-30 mins, or up to an hour if you want. This will allow them time to dry out a bit before hitting the hot oven. They should be “tacky” to the touch, but not stick to your fingertips. This is another important step to assuring your macarons develop feet! When they dry out they can’t spread out in the oven, and are forced to rise up. That’s what creates the feet!
Bake for 20 mins. DO NOT UNDER BAKE, even if they look done! Otherwise they will stick to your tray.
Meanwhile mix the buttercream. Whip butter with an electric mixer until pale and fluffy. Slowly add sugar. Then place sieve on top of a bowl the same size. Work raspberries through the sieve with a spatula, pushing them through, mashing them around until you extract their juice. You want 3 tablespoons of juice.
Add juice to buttercream, and whip until combined. Transfer to a pastry bag, fitted with a small tip (about ¼ ” in diameter)
Reverse cookie shells on their backs, and pipe a small mound of filling on one of them. Top with the other shell et Voila!
If not eating right away, keep refrigerated.
ABOUT THIS CHANNEL
I’m Beth Le Manach and I believe food tastes better when shared. Subscribe to my channel, Entertaining with Beth, to learn easy recipes elegant enough for entertaining but simple enough for a weeknight meal. So go ahead and have friends over! New Videos post every Saturday! https://bit.ly/BethsEntertaining.”
JOIN THE GALAXY GANG!!! https://bit.ly/galaxygang
HEY GUYS! Today I’m doing a haul/unboxing video of some SUPER CHEAP makeup dupes I found on a website called Hush! I’ve got a ton of eyeshadow palette dupes from Too Faced, Lime Crime, Anastasia Beverly Hills, and Urban Decay, and some other fun makeup items as well!
Lots of you guys are asking about the polish I’m wearing in this video – it’s Cats Eye by Little Ondine! https://us.littleondine.com/shop/cats-eye
Here are the products I’m showing you in the video – everything is from HUSH and you can get 10% off your whole order with the code KELLI10 at checkout!
Beauty Creations Boudoir Eyeshadow Palette (Cheeky): https://shophush.com/products/boudoir-eyeshadow-palette-cheeky
Beauty Creations Butterfly Eyeshadow Palette: https://shophush.com/products/butterfly-eyeshadow-palette
Okalan Contouring Palette: https://shophush.com/products/contouring-palette
Okalan Glowing Palette Shimmer Kit (Moonlight): https://shophush.com/products/glowing-palette-shimmer-kit-moonbeam
Rude Highlighting Shimmer Trio: https://shophush.com/products/highlighting-shimmer-trio
Okalan Jumbo Pressed Pigment Eyeshadow Palette: https://shophush.com/products/pressed-pigment-eyeshadow-palette
Santee Metals Mirror Effect Nail Polish: https://shophush.com/collections/nails/products/mirror-effect-nail-polish?variant=31354624521
Okalan Jupiter 8 Color Eyeshadow Palette: https://shophush.com/products/jupiter-8-color-eyeshadow-palette
Okalan Natural Eyeshadow Palette Color in “Night”: https://shophush.com/collections/eyeshadow-1/products/natural-eyeshadow-palette-color?variant=30480293513
Beauty Treats Natural Sugar Lip Scrub in “Watermelon”: https://shophush.com/products/natural-sugar-lip-scrub?variant=29235856457
Rude Obnoxious Volume Mascara: https://shophush.com/products/obnoxious-volume-mascara
Italia Deluxe Ultra Fine Liner in Gold & Neon Blue: https://shophush.com/products/ultra-fine-eye-liner-colors?variant=29235781449
————————————–
NAIL POLISH 101:
How to keep your manicure from chipping/peeling off: https://bit.ly/lastingmanicures
How to clean up your manicure: https://bit.ly/cleanupnails
How to file your nails square: https://bit.ly/squarenails
How to make your nails grow stronger: https://bit.ly/growstrongnails
How to make your nail polish dry faster: https://bit.ly/drynailsquick
How to make your own dotting tools: https://bit.ly/DIYdottingtools
How to fix a broken nail: https://bit.ly/fixabrokennail
How to fix an old bottle of nail polish: https://bit.ly/fixoldpolish
ULTIMATE ombre nail art guide: https://bit.ly/ultimateombre
MAKEUP VIDEOS:
Carli Bybel Deluxe Palette first impressions: https://bit.ly/pinkhaloeye
Huda Beauty Rose Gold Palette first impressions: https://bit.ly/rosegoldeyes
CHECK OUT MY OTHER RECENT VIDEOS!
Nail art using EYESHADOW: https://bit.ly/eyeshadownailart
Easy glitter ombre nail art: https://bit.ly/glitterombre
Holo bling diamond nail art: https://bit.ly/holoblingnails
————————————–
MY GALAXY STAMPING PLATE: https://bit.ly/2oGP0eo
MY COLLAB POLISH, BLUEBIRD: https://www.livelovepolish.com/products/picture-polish-bluebird#_l_lr
LIQUID LATEX: https://amzn.to/2eMsESq
MATTE TOP COAT: https://go.magik.ly/r/kellimarissa/16340/
Dotting Tools: https://go.magik.ly/r/kellimarissa/16341/
Striping Tape: https://go.magik.ly/r/kellimarissa/16342/
MY CLEANUP BRUSH (only $1!!): https://go.magik.ly/ml/52bp/
FAVE NAIL POLISH RETAILER: https://bit.ly/hbbeauty
USE THE CODE “KELLI” FOR 15% OFF ALL ORDERS!!
————————————–
GET SOCIAL!!
INSTAGRAM: @kellimarissa
TWITTER: @kelli_marissa
SNAPCHAT: kellidobrin
Use the hashtag #kellimarissa to show me your recreations!
————————————–
FTC: These products were provided free of charge for my honest review. This post contains affiliate links.
In China, we have purchased many times, this time is the most successful and most satisfactory, a sincere and realiable Chinese manufacturer!